14 May, 2024 • 6 min read
How To Integrate Push Notifications in Angular
AngularNPM
AngularNotifications
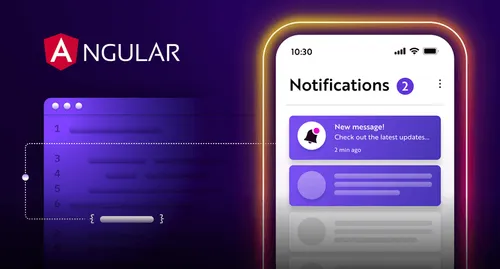
To integrate push notifications into your Angular application, you’ll need to set up Firebase Cloud Messaging (FCM) and install the Firebase SDK in your project. Next, add the Firebase Messaging service to your Angular component and create a method to send notification requests to FCM. Don’t forget to request notification permission from users and handle push notification events. By following these steps, you’ll be able to send targeted, personalized notifications to your users. Now, dive deeper to explore the nuances of displaying notifications, testing, and troubleshooting to guarantee a seamless user experience.
Contents
Key Takeaways
- Create a Firebase project, enable Cloud Messaging API, and install the Firebase SDK in your Angular project to set up push notifications.
- Import necessary Firebase modules and add Firebase Messaging service to your Angular component to send notification requests to FCM.
- Request notification permission from users and respect their decisions to ensure user awareness and choice.
- Handle push notification events, such as click and close events, to redirect users and remove notifications, and log errors for development teams.
- Test push notifications by verifying correct notification requests, ensuring proper handling of responses, and troubleshooting issues promptly.
Introduction
Firebase Cloud Messaging (FCM) is a cool tool for sending push notifications in Angular apps. It helps you reach users easily and keep them engaged. FCM is simple to use, can handle a lot of users, and is reliable. With FCM, you can send personalized notifications to users, which can boost engagement and conversions.
To set up FCM in your Angular app, you need to follow a few steps:
- Create a Firebase project
- Enable the Cloud Messaging API
- Install the Firebase SDK in your Angular project
Once you’ve done these steps, you can start sending push notifications to users and see how they interact with them.
Following a guide can help you integrate FCM into your Angular app smoothly and take advantage of push notifications.
Setting Up Firebase Cloud Messaging
To get started with Firebase Cloud Messaging in your Angular app, you need to create a Firebase project. Follow these easy steps:
- Create a Firebase project: Go to the Firebase website and make a new project. This will give you a special project ID for later use.
- Enable the Cloud Messaging API: In your Firebase project, go to the Cloud Messaging section and click ‘Get started’ to turn on the Cloud Messaging API.
- Install the Firebase SDK: Open your Angular project folder and run
npm install firebaseto add the Firebase SDK.
Adding Push Notifications to Angular Application

Now that your Firebase Cloud Messaging setup is done, you can add push notifications to your Angular app. This involves creating a notification service that talks to FCM to send notifications to your app users.
Here’s how you can do it:
- Import the necessary Firebase modules and add the Firebase Messaging service to your Angular component.
- Create a method in the service to send notification requests to FCM, including the title and message.
- FCM will handle sending the notifications to your app users.
- Your notification service will get a response that you can use to update your app or do other actions.
Requesting Notification Permission
To send you notifications, we first need to ask for your permission. This is important to make sure you’re okay with receiving messages from us. Asking for permission is a rule we’ve to follow to send notifications.
Here’s how we can ask for your permission:
- Check if you’ve said yes or no before using
Notification.permission - If you haven’t given permission yet, we’ll ask you using
Notification.requestPermission() - We’ll respect your decision, whether you say yes, no, or maybe later
Asking for your permission is a way for us to make sure you know what notifications you might get and allow you to choose if you want them or not. This helps us give you a better experience and also follows the rules about keeping your information safe.
Handling Push Notification Events
When you use push notifications in your Angular app, you need to handle events like clicking or closing notifications. Here are some common events to manage:
- Click Event: When a user clicks on a notification, you can redirect them to a specific page.
- Close Event: If a user closes a notification, you can remove it from the list.
- Error Event: When an error occurs while showing a notification, log the error and tell the development team.
To handle these events, create a service that listens and responds accordingly. For instance, redirecting a user to a page when they click on a notification. By managing events well, you can give users a smooth experience and ensure your app reacts correctly to push notifications.
It’s important to handle these events properly to improve user experience and engagement.
Displaying Notifications
After setting up push notifications, it’s time to show them to your users. This is super important for keeping users engaged and happy.
Here are some tips for showing notifications:
- Let users pick what notifications they want.
- Send notifications when users are most active.
- Keep track of how users interact with notifications to make them better.
Testing Push Notifications
To make sure your push notifications work well, you need to test them properly. Testing push notifications is super important to avoid bothering your users with notifications that don’t work.
Here’s how you can test them effectively:
- First, check that your notification request is sent correctly to FCM.
- Then, make sure the notification response is handled properly.
- Test how the notification looks on the user’s device to ensure it shows up correctly.
If you encounter any issues, follow these steps to fix them quickly:
- Review the notification payload, API keys, and service worker setup to find the problem.
- Use browser tools to examine the notification request and response.
Conclusion
By adding Firebase Cloud Messaging to your Angular app, you’ve set up a way to send push notifications easily. This helps you keep users engaged and makes their experience smoother. With FCM, you can now send notifications to users, bring them back to your app, boost sales, and make more money.
Here are some good things about using FCM:
- Works for big apps: FCM can handle sending notifications to many users, which is great for apps with lots of people.
- Sends personalized messages: You can make notifications that are just right for your users, so they’re more likely to pay attention and do what you want.
- Gives you instant data: FCM shows you real-time info on how users are acting, so you can make your notifications even better.

Ankur
Ankur, with over 20 years of expertise, simplifies the complex world of online marketing to boost your conversion rates. He shares actionable insights that anyone can apply to see immediate results. Trust Ankur to guide you through proven strategies that enhance your online presence and profitability.
Related Blogs

By Ankur • 6 min read
The Benefits of Using Free Notification Services
Free notification services offer big perks for businesses, like Feedify, which help keep customers coming back and staying connected. These services make it easier for...
By Ankur • 7 min read
3 Tips for Sending Push Notifications For the Joyful Holiday Season
To maximize your holiday push notification campaigns, you'll want to focus on personalization, strategic timing, and themed promotions. First, leverage user data to segment your...
Holiday Marketing Tips
Holiday Campaigns
By Ankur • 6 min read
Boost User Engagement: 5 Push Notification Strategies for Crypto Wallets
You can supercharge your crypto wallet with push notifications to enhance security, simplify transaction tracking, and inform your investment decisions. You'll receive alerts about potential...
Crypto Wallets
Blockchain Technology
