
24 May, 2024 • 4 min read
Guide to Add Push Notifications to an Android App With Java and Kotlin
android-kotlin
android-java
You’ll start by configuring Firebase for your Android app, adding the Android platform, and registering your app in the Firebase console. Next, you’ll set up your Android project, adding the required libraries and initializing the Feedify SDK with your API key. After configuring your website and setting up push notifications, you’ll be ready to access the full potential of push notifications. Simply log in to your Feedify account, create a notification, and customize it to engage your users. From here, you’ll elevate your app to the next level, tapping into the full potential of push notifications.
Contents
Key Takeaways
⢠Create a Firebase project, add Android platform, and download google-services.json file for Android configuration.
⢠Initialize Feedify SDK with API key and set up Android notification channels for better management.
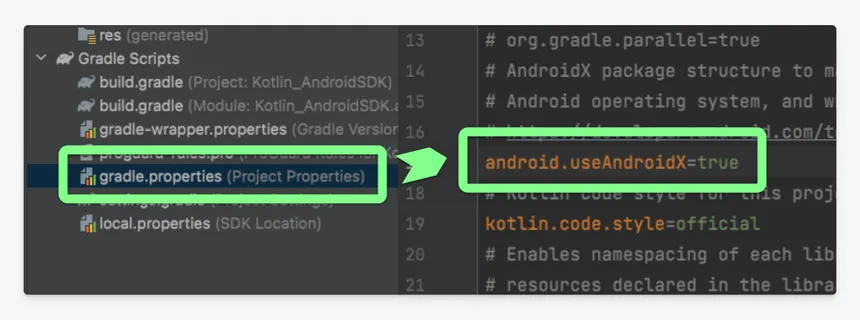
⢠Add Feedify SDK and other required push notification libraries to build.gradle file for Android app development.
⢠Test the app to ensure correct integration of Feedify SDK and start sending push notifications to users.
⢠Log in to Feedify account to create and customize notifications with titles, messages, images, and videos for better user interaction.
Firebase Configuration
Setting up push notifications for your Android app is easy! Here’s how you can do it:
- Create a Firebase project for your app.
- Add the Android platform to your Firebase project.
- Provide your project’s package name in Android Studio.
- Register your app in the Firebase console by filling in the required fields and clicking ‘Register App’.
- Download the google-services.json file and add it to your Android project in Android Studio.
- Enable the Cloud Messaging API in the Firebase console for push notifications.
Once you’ve completed these steps, your Firebase project will be all set up and ready to work with Feedify.
Android Configuration
To set up Feedify in your Android app, you need to add the Feedify SDK and configure it for push notifications. Here’s how you can do it:
- Add the Feedify SDK and any other required push notification libraries to your build.gradle file.
- Initialize the Feedify SDK with your API key and set up Android notification channels for better notification management.
- Test your app to ensure that the Feedify SDK is integrated correctly and start sending push notifications to your users.
Website Configuration
To set up your website with Feedify, follow these simple steps:
- Create a Feedify account and set up your project in the Feedify dashboard to get a special API key.
- In the dashboard, go to the ‘Web’ section and add a few lines of code to your website to enable push notifications.
- Replace the placeholder API key with the one you got from the Feedify dashboard.
- Test push notifications on your website using the Feedify dashboard.
- Once you complete the web integration and account setup, you can start sending push notifications to your Android app users.
Send Your First Push Notification
Now that your Android app is set up to work with Feedify, you’re all set to send your first push notification from the Feedify dashboard. This is a big step because it’s where your push notification journey begins.
To send your first notification, log in to your Feedify account and go to the dashboard. Click on the ‘Create Notification’ button and type in a title and message for your notification. You can also make your push notification more interesting by adding pictures, videos, or other media.
Here’s how you can send your first push notification:
- Log in to your Feedify account.
- Click on the ‘Create Notification’ button.
- Enter a title and message for your notification.
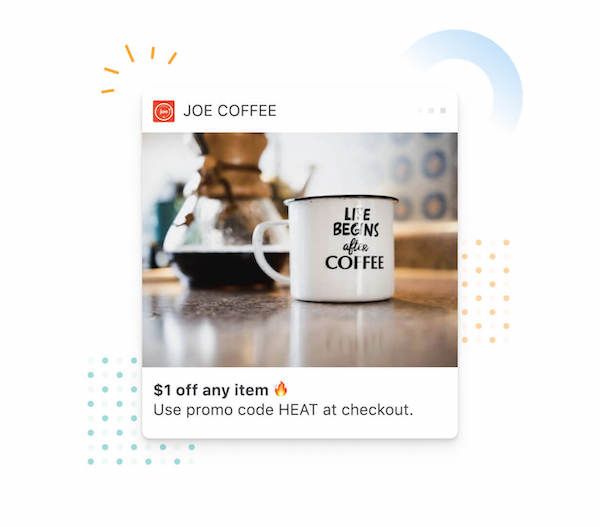
- Add images, videos, or other media to make it more engaging.
- Customize your notification for better user engagement.
- Click ‘Send’ to deliver it to your app users.
Remember to test your notification to make sure it’s working correctly.
With your first push notification sent, you can now explore more features and strategies to keep your users engaged and boost conversions.

Ankur
Ankur, with over 20 years of expertise, simplifies the complex world of online marketing to boost your conversion rates. He shares actionable insights that anyone can apply to see immediate results. Trust Ankur to guide you through proven strategies that enhance your online presence and profitability.
Related Blogs
By Ankur • 6 min read
The Benefits of Using Free Notification Services
Free notification services offer big perks for businesses, like Feedify, which help keep customers coming back and staying connected. These services make it easier for...
By Ankur • 6 min read
Boost User Engagement: 5 Push Notification Strategies for Crypto Wallets
You can supercharge your crypto wallet with push notifications to enhance security, simplify transaction tracking, and inform your investment decisions. You'll receive alerts about potential...
Crypto Wallets
Blockchain Technology
By Ankur • 7 min read
3 Tips for Sending Push Notifications For the Joyful Holiday Season
To maximize your holiday push notification campaigns, you'll want to focus on personalization, strategic timing, and themed promotions. First, leverage user data to segment your...
Holiday Marketing Tips
Holiday Campaigns